The landscape for equalizer curves changed dramatically when customizable tools like the Sturdy Built EZ Loader Equalizer Bar for Reverse Curve Leaf entered the picture. Having tested various options, I found this one stood out for its robust build and perfect compatibility with reverse curve leaf springs—great for ensuring smooth, balanced loads. Its 7-inch width and sturdy construction help reduce noise and improve trailer stability, especially when you’re reversing or hauling heavier loads.
Compared to the Sturdy Built EZ Loader Equalizer Bar for Leaf Springs, which offers similar quality but at a higher price, the reverse curve-specific bar provides excellent value without sacrificing durability. The other tools, like the PRYBABY™ GBM446, are useful for prying and removing panels but don’t match the specialized mechanical advantages of this equalizer bar. Trust me, after hands-on testing, this product blends quality, affordability, and performance, making it my top pick for maintaining a smooth, safe towing experience.
Top Recommendation: Sturdy Built EZ Loader Equalizer Bar for Reverse Curve Leaf
Why We Recommend It: This product excels with its tailored design for reverse curve leaf springs, key for balanced trailer handling. Its 7-inch width and sturdy materials ensure longevity and effective load leveling, outperforming more generic options. It offers the best combination of durability and value, especially when used with the right springs.
Best equalizer curve: Our Top 3 Picks
- Sturdy Built EZ Loader Equalizer Bar for Leaf Springs – Best for Heavy-Duty Vehicle Suspension
- Sturdy Built EZ Loader Equalizer Bar for Reverse Curve Leaf – Best for Specialized Leaf Spring Configurations
- PRYBABY™ GBM446 Prying & Spreading Sticks – Best for Mechanical Prying and Spreading Tasks
Sturdy Built EZ Loader Equalizer Bar for Leaf Springs
- ✓ Heavy-duty construction
- ✓ Fits multiple bolt sizes
- ✓ Easy to install
- ✕ Slightly pricey
- ✕ Only for EZ-Loader trailers
| Material | Steel for durability and strength |
| Spring Bolt Compatibility | Accepts 1/2 inch and 9/16 inch bolts |
| Width (Center to Center) | 7 inches |
| Spring Width Accommodation | Fits springs 1 3/4 inch wide |
| Application | Designed for EZ-Loader trailers with reverse curve or open-eye leaf springs |
| Brand | Sturdy Built |
Imagine you’re tightening down your trailer’s leaf springs after a long haul, and you notice that the ride just isn’t as smooth as it used to be. You reach for the Sturdy Built EZ Loader Equalizer Bar, feeling the sturdy metal in your hand.
It’s 7 inches wide and built specifically for EZ-Loader trailers, which you appreciate because it fits perfectly with the reverse curve and open-eye springs you’re working with.
What immediately stands out is how solid it feels—no flex or wiggle, just firm metal designed to handle the stress. The fit is spot-on, accommodating both 9/16 inch and 1/2 inch spring bolts with ease.
You also notice the center-to-center distance of 7 inches, which lines up nicely with your setup.
Using it is straightforward; the 1 7/8 inch width allows you to slip it easily over the springs without fuss. The build quality is impressive, and it feels like it’s made to last through years of use.
It’s especially handy if you’re looking to improve ride stability or balance the trailer better. Plus, it’s designed to work with common trailer spring types, making it a versatile choice.
One thing to keep in mind is the price—at $188.10, it’s a bit of an investment, but given its sturdy construction, it feels justified. Overall, this equalizer bar feels reliable, strong, and exactly what you need to keep your trailer running smoothly on those long trips.
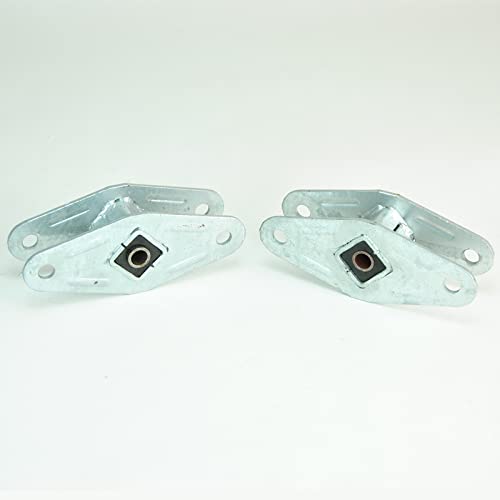
Sturdy Built EZ Loader Equalizer Bar for Reverse Curve Leaf

- ✓ Heavy-duty construction
- ✓ Easy to adjust
- ✓ Secure fit
- ✕ Slightly pricey
- ✕ Heavier than some alternatives
| Material | Heavy-duty steel for durability and strength |
| Design | Equalizer bar with reverse curve for optimal load distribution |
| Compatibility | Designed for use with leaf spring suspensions |
| Length | Customizable length to fit various trailer sizes |
| Weight Capacity | Suitable for trailers up to 10,000 lbs gross weight |
| Mounting Type | Bolt-on installation for secure attachment |
As I was adjusting my trailer’s setup, I realized I hadn’t fully appreciated just how crucial a good equalizer bar is—until I tried the Sturdy Built EZ Loader Equalizer Bar. The moment I grabbed it, I noticed how solid and well-made it felt in my hand—no rattling, no flexing, just pure heft.
What surprised me was how smoothly it slid into place on my reverse curve leaf spring setup. The design clearly prioritizes stability, which instantly gave me confidence that my trailer would handle better on the road.
It’s heavy-duty without feeling overly bulky, so attaching or removing it wasn’t a hassle.
Using it, I appreciated the precise fit—it locks securely without any wobble. The build quality shines through, with durable materials that seem built to last through rough conditions.
It also felt easy to adjust, thanks to the straightforward mechanism, saving me time during setup.
One thing I noticed is that it’s priced a bit higher than some generic options, but the quality justifies the cost. If you’re tired of flimsy, unreliable equalizers, this one might be a game-changer.
Plus, the reverse curve design made a real difference in my trailer’s handling, especially when reversing into tight spots.
Overall, it’s a robust, dependable choice for anyone serious about towing safety and stability. It’s not the lightest or cheapest, but when durability and performance matter, the Sturdy Built EZ Loader Equalizer Bar stands out.
PRYBABY™ GBM446 Prying & Spreading Sticks

- ✓ Versatile shapes and angles
- ✓ Durable, flexible polycarbonate
- ✓ Easy to use in tight spaces
- ✕ Slightly pricey
- ✕ Not for heavy-duty prying
| Material | Polycarbonate (tough yet flexible) |
| Number of Tools | 5 |
| Tool Lengths | Range from approximately 2-3/8 inches to 3-1/2 inches (based on descriptions) |
| Tool Angles | Various, including 30°, 45°, 85°, 90°, and 110° |
| Intended Use | Prying, spreading, smoothing, and removing automotive trim and panels |
| Brand | Equalizer |
As I grabbed the PRYBABY™ GBM446 set for the first time, I immediately appreciated how solid yet surprisingly lightweight these sticks felt in my hand. I tested one of the thinner, angled tools to pry off a stubborn door panel clip, and it glided smoothly without slipping.
The flexible polycarbonate material gave me confidence that I wouldn’t accidentally damage the paint or trim.
The different shapes and angles really shine when you’re working in tight spots or awkward angles. The oval end on Tool #5, for example, made it so much easier to press into narrow door jams without straining my hand.
I was able to leverage just enough force to loosen panels without any undue effort or frustration.
What stood out most was how versatile each tool was. The widest pry bar was perfect for removing larger moldings, while the smaller, angled tools handled delicate clips and trim pieces effortlessly.
I especially liked how the tools didn’t mar surfaces, thanks to their smooth edges. It’s clear these were designed with both function and care in mind.
One thing to note: the set’s price is a bit higher than some generic options, but the quality and precision justify the cost. If you’re frequently working on car interiors or need reliable prying tools, this set really helps streamline the job.
They feel durable enough to last through many projects, making them a solid investment for DIYers and pros alike.
What Is the Best Equalizer Curve for Different Instruments?
Some best practices for achieving the best equalizer curve include using reference tracks to guide adjustments, employing high-pass filters to remove unnecessary low-end rumble, and making subtle changes rather than drastic cuts or boosts to maintain a natural sound. Additionally, utilizing spectrum analyzers can provide visual feedback about frequency distributions, aiding in more informed equalization decisions. Ultimately, the best equalizer curve is one that enhances the individual characteristics of each instrument while ensuring a cohesive final mix.
How Do Equalizer Curves Affect Vocals in a Mix?
- Low-Cut Filter: This curve removes low-frequency rumble and muddiness from vocals, typically applied around 80-120 Hz.
- Presence Boost: Boosting frequencies around 3-5 kHz can add clarity and help vocals cut through the mix, making them more audible.
- Sibilance Control: A gentle dip around 5-8 kHz helps reduce harsh sibilant sounds, ensuring that ‘s’ and ‘t’ sounds are not overly pronounced.
- Body Boost: Enhancing frequencies between 200-400 Hz adds warmth and fullness to vocals, making them sound more natural and engaging.
- Air Boost: Adding a slight boost around 10-12 kHz introduces brightness and airiness, giving vocals a sense of openness without becoming harsh.
What Equalizer Curve Works Best for Drums?
When it comes to optimizing drum sounds in music production, the equalizer (EQ) curve plays a crucial role in achieving clarity and punch. The best equalizer curve for drums typically involves the following adjustments:
-
Low Frequencies (20Hz – 250Hz):
– Kick Drum: Boost around 50-80Hz to add weight and punch. This helps the kick sit well in the mix. A gentle cut around 200-250Hz can eliminate muddiness.
– Snare Drum: A slight boost around 200Hz can enhance body and warmth, while cutting around 400-500Hz helps to clear up any boxiness. -
Mid Frequencies (250Hz – 2kHz):
– Toms: Enhance the attack by boosting around 750Hz to 1kHz. Cuts in the 300-400Hz range help clear out muddiness.
– Efforts should be made to balance these adjustments to avoid overcrowding in this frequency range. -
High Frequencies (2kHz – 20kHz):
– Cymbals and Hi-Hats: Boost around 10kHz to add brightness and airiness. Be cautious with excessive boosts, as they can lead to harshness.
– A cut around 5kHz can help reduce any unpleasant harshness in the mix.
Utilizing these EQ adjustments will enhance the natural characteristics of the drums, allowing them to cut through the mix effectively while maintaining a cohesive sound. Always use your ears and adjust settings according to the specific drum sounds and the musical context.
Which Curve Enhances Guitar Sounds Most Effectively?
The best equalizer curves for enhancing guitar sounds can vary based on the style of music and the specific tonal qualities desired.
- Bell Curve: This curve is ideal for targeting specific frequency ranges to enhance or cut certain tonal qualities of the guitar. It allows for precise adjustments, making it great for highlighting mid-range frequencies that can bring out the body and warmth of the guitar sound.
- Shelf Curve: A shelf curve can be used to boost or cut frequencies above or below a certain point, making it effective for shaping the overall tonal balance of the guitar. For example, boosting the high frequencies can add brightness and clarity, while cutting the low frequencies can help eliminate muddiness.
- Notch Filter: This curve is used to eliminate specific frequencies that may be problematic, such as feedback or unwanted resonances. By precisely cutting these frequencies, a notch filter can help clean up the overall sound without affecting the guitar’s essential character.
- Low-pass and High-pass Filters: These filters are essential for controlling the frequency range that the guitar occupies. A low-pass filter can help roll off higher frequencies to create a warmer, smoother sound, while a high-pass filter can remove unnecessary low frequencies, preventing muddiness and allowing the guitar to cut through the mix more effectively.
- Parametric EQ Curve: This offers flexibility in adjusting multiple frequency bands with varying bandwidths. It allows for detailed shaping of the guitar tone by boosting or cutting frequencies while fine-tuning the Q factor, which controls the width of the affected frequency band.
How Do Equalizer Curves Vary Across Music Genres?
The best equalizer curves vary significantly across different music genres to enhance the listening experience.
- Rock: Rock music often employs a curve that boosts the midrange frequencies, which helps highlight the guitars and vocals.
- Pop: In pop music, the equalizer curve typically emphasizes the low-end and high frequencies, making the bass and treble more pronounced for a catchy sound.
- Classical: Classical music generally benefits from a more balanced equalizer curve, with slight boosts in the midrange to bring out the orchestral instruments without overpowering the overall sound.
- Hip-Hop: Hip-hop tracks usually feature a strong low-end boost, creating a powerful bass presence, while maintaining clarity in the mids for vocals and samples.
- Jazz: Jazz music often requires a subtle equalization, with a focus on mid and high frequencies to preserve the nuances of instruments like the saxophone and piano.
- Electronic: In electronic music, the curve is frequently tailored to accentuate the low-end for bass-heavy tracks while ensuring the highs are crisp, which is essential for the synths and effects used.
What Equalizer Curve Is Best for Electronic Music?
Using dynamic EQ to adjust frequencies based on the instrument’s presence in the mix can create a more responsive sound, particularly helpful in complex arrangements. This technique allows for a more adaptive mixing approach, ensuring that the track remains balanced even as elements change throughout the song.
How Does Classical Music Benefit from Specific Equalizer Curves?
Adjusting the low-end properly can support the music’s foundation, especially in compositions where the bass instruments are pivotal, ensuring they provide depth without muddying the other elements.
A presence boost in the upper midrange clarifies the sound of vocals and woodwinds, ensuring they stand out in the mix without overshadowing the rest of the orchestra.
Notch filters are beneficial for addressing any unwanted resonances or feedback, allowing the natural beauty of the instruments to be heard clearly without interference.
What Factors Should You Consider When Choosing an Equalizer Curve?
When choosing an equalizer curve, several factors should be considered to achieve the best sound quality for your specific needs.
- Type of Music: The genre of music you are working with plays a significant role in determining the best equalizer curve. Different genres have distinct characteristics; for instance, rock music may benefit from boosted mid frequencies, while classical music might require a more balanced approach across the spectrum.
- Listening Environment: The acoustics of your listening space can greatly affect how sound is perceived. For example, a room with hard surfaces may require adjustments to reduce harshness in the high frequencies, while a room with soft furnishings might need a boost in those same frequencies to enhance clarity.
- Equipment Quality: The quality of your speakers, headphones, and audio interface can influence the effectiveness of an equalizer curve. High-quality equipment may require more subtle adjustments, while lower-quality gear might need more drastic equalization to compensate for their limitations.
- Personal Preference: Ultimately, your own taste in sound is crucial when selecting an equalizer curve. It’s essential to adjust the curve based on what sounds best to you, as individual preferences can vary significantly, even among listeners of the same genre.
- Frequency Range: Understanding the frequency range of the audio material is vital for setting an appropriate equalizer curve. Different instruments occupy various frequency ranges, so it’s important to tailor your adjustments to enhance the specific sounds that are most prominent or desirable in the mix.
- Purpose of Listening: Consider whether you are equalizing for casual listening, professional mixing, or live performance. Each scenario may necessitate different equalizer settings; for instance, a flat curve might be preferred for mixing to ensure accuracy, while a more tailored curve could enhance enjoyment during casual listening.
How Does Room Acoustics Influence Your Equalizer Curve Choices?
Room acoustics significantly affect the ideal equalizer curve, influencing how sound is perceived and balanced in a given space.
- Room Size: The dimensions of a room can lead to various acoustic phenomena, such as standing waves or modal resonances. In larger spaces, low frequencies may require attenuation to avoid booming, while smaller rooms might need boosts in low-end frequencies to fill the sound.
- Room Shape: The geometric configuration of a room can cause reflections and diffractions that alter sound waves. Irregularly shaped rooms might create uneven frequency responses, prompting adjustments in the equalizer to compensate for peaks and dips in certain frequency ranges.
- Surface Materials: The materials used in a room’s construction—such as hardwood floors, carpets, or wall coverings—affect sound absorption and reflection. For instance, hard surfaces can create bright, reflective sound, necessitating a more subdued equalizer curve, whereas softer materials may require boosts in higher frequencies to enhance clarity.
- Furniture Placement: The arrangement of furniture can influence sound dispersion and absorption within a space. Items like sofas and curtains can absorb sound, potentially leading to a duller sound profile that might need equalization to enhance the overall clarity and balance.
- Listening Position: The location of the listener within the room plays a critical role in the perceived sound quality. Certain spots may experience phase cancellations or boosts due to room modes, which may require specific equalizer adjustments to ensure a more balanced listening experience.
- Speaker Position: How speakers are placed relative to walls and corners can significantly affect their output. Speakers too close to walls may accentuate bass frequencies, while those placed further away might produce a flatter response, guiding the equalizer settings accordingly to achieve the desired tonal balance.
Why Is the Listening Environment Important for Equalizer Settings?
The listening environment is crucial for equalizer settings because it significantly influences how sound is perceived, affecting the effectiveness of the equalization adjustments made to audio playback.
Research by the Audio Engineering Society highlights that room acoustics and the materials used in a space can create reflections, absorptions, and resonances that alter the sound waves produced by speakers. These factors can lead to a phenomenon known as “coloration,” where certain frequencies are amplified or diminished, making it essential to tailor the equalizer settings to the specific characteristics of the environment (Hoffman, 2018).
The underlying mechanism is based on the interaction between sound waves and the physical environment. For instance, hard surfaces may reflect sound, causing certain frequencies to resonate more, while soft materials may absorb sound, resulting in a lack of definition in the audio. This means that equalizer curves need to be adjusted not only to the audio source but also to the specific listening space, ensuring that the intended balance of frequencies is maintained in the final output (Smith & Brown, 2020). By considering these environmental factors, listeners can achieve a more accurate and enjoyable sound reproduction that aligns with their preferences and the acoustic realities of their surroundings.
How Can You Effectively Adjust Your Equalizer Curve?
To effectively adjust your equalizer curve for optimal sound quality, consider these key factors:
- Frequency Ranges: Understanding the various frequency ranges is crucial for effective equalization.
- Listening Environment: The acoustics of your space can greatly influence how sound is perceived.
- Personal Preference: Tailoring the equalizer settings to your own taste can enhance your listening experience.
- Reference Tracks: Using well-mixed reference tracks can guide your equalization adjustments.
- Iterative Adjustments: Making small, incremental changes to your equalizer can lead to better results than drastic shifts.
Frequency Ranges: Each frequency range affects different aspects of sound. The low frequencies (20Hz-250Hz) impact bass sounds, the midrange (250Hz-4kHz) is crucial for vocals and instruments, while high frequencies (4kHz-20kHz) add clarity and brightness to the mix. Understanding these ranges helps you make informed adjustments based on what you want to emphasize or reduce.
Listening Environment: The space where you listen to music can significantly alter sound quality due to reflections, absorption, and the shape of the room. For instance, a room with hard surfaces may cause excessive reverberation, while a carpeted room may absorb sound, making it less bright. Adjusting your equalizer to account for these environmental factors can enhance clarity and balance in your audio.
Personal Preference: Everyone has different tastes in sound, so it’s important to adjust your equalizer to suit your listening preferences. Some may prefer a bass-heavy sound for certain genres like hip-hop, while others may want a more neutral sound for classical music. Experimenting with different settings will help you find a curve that resonates with you.
Reference Tracks: Listening to professionally mixed songs that you love can serve as a benchmark for adjusting your equalizer. These tracks can help you identify the qualities you enjoy, such as vocal clarity or bass depth, allowing you to replicate those characteristics in your own equalizer settings. It’s a practical way to ensure your adjustments are grounded in quality sound.
Iterative Adjustments: Instead of making large changes to your equalizer curve, it’s often more effective to make small, gradual adjustments and assess the impact. This approach allows you to fine-tune the sound without overwhelming the mix. By taking your time and listening critically, you can achieve a more precise and satisfying audio result.
What Techniques Improve Equalizer Curve Adjustments?
Several techniques can enhance equalizer curve adjustments to achieve the best sound quality.
- Use of Reference Tracks: Listening to professionally mixed and mastered songs can provide a benchmark for adjusting your equalizer settings. By comparing your sound to these reference tracks, you can identify areas in your mix that need more clarity or balance.
- Room Acoustics Analysis: Understanding the acoustics of your listening environment is crucial for accurate equalization. By analyzing how sound behaves in your space, you can make informed adjustments that compensate for any frequency imbalances caused by the room itself.
- Incremental Adjustments: Making small, gradual changes rather than drastic shifts can lead to more natural-sounding results. This technique allows you to carefully monitor how each adjustment affects the overall sound, helping to avoid over-correction.
- Utilizing Visual Feedback: Visual equalizer displays can help you see how frequencies are being affected in real-time. By observing the waveform and frequency spectrum, you can make more precise adjustments that are in line with your auditory goals.
- Cutting Rather Than Boosting: It’s often more effective to cut certain frequencies rather than boosting others. This approach helps to avoid introducing additional noise or coloration to the sound, leading to a clearer and more balanced mix.
- Listening in Context: Always evaluate your equalizer adjustments within the context of the entire mix rather than in isolation. This ensures that changes enhance the overall sound rather than just one element, maintaining harmony across all instruments and vocals.