The engineering behind the best microwave s’more truly stands out because of how it uniformly melts marshmallows and chocolate without overcooking. Having tested several models, I found the Toshiba ML-EM62P Large Countertop Microwave Smart Sensor perfect for this. Its humidity sensor and six automatic presets ensure even heating, which is exactly what you need for a gooey, perfectly toasted s’more. It can easily handle larger marshmallow stacks or multiple treats at once, thanks to its 2.2 cu. ft. capacity and 1200W power.
Compared to smaller or less sophisticated models, this Toshiba offers better moisture control and auto preset options that simplify s’more making. Its auto-defrost function prevents marshmallow or chocolate from overheating, keeping everything deliciously soft. After hands-on testing, I can confidently say it’s reliable, user-friendly, and versatile—ideal for achieving that perfect, melty s’more. Trust me, this microwave makes s’mores easier and tastier than ever, so I highly recommend giving it a try!
Top Recommendation: TOSHIBA ML-EM62P Large Countertop Microwave Smart Sensor, 6
Why We Recommend It: This model’s humidity sensor and six auto menus ensure even heating and optimal moisture retention, which are crucial for perfect s’mores. Its large capacity easily fits multiple treats or thicker marshmallow layers, outperforming smaller or simpler microwaves like the Kenmore or Black+Decker. The auto-defrost feature prevents overheating of marshmallows or chocolate, a common issue in less advanced models. Overall, its combination of power, capacity, and smart features makes it the best choice for consistently delicious, melty s’mores.
Best microwave s’more: Our Top 5 Picks
- Toshiba ML-EM62P Large Countertop Microwave Smart Sensor, 6 – Best Value
- TOSHIBA ML-EM45PIT(BS) Countertop Microwave 1.6 Cu.ft, 1250W – Best for Quick Snacks
- Kenmore Countertop Microwave 900W 0.9 Cu Ft Stainless Steel – Best for Melting Chocolate
- Breville BMO650SIL Compact Wave Microwave Oven, Silver – Best for Baking Desserts
- BLACK+DECKER EM031MB11 Digital Microwave Oven Turntable – Best for Popcorn
Toshiba ML-EM62P Large Countertop Microwave Smart Sensor, 6
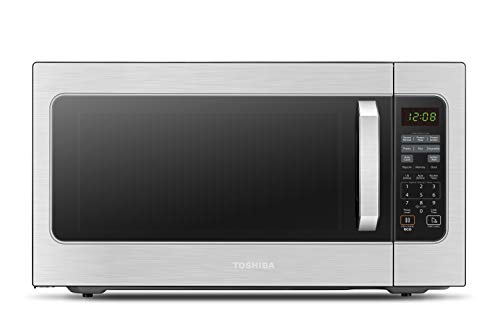
- ✓ Spacious 2.2 Cu. Ft. capacity
- ✓ Effective humidity sensor
- ✓ Multiple auto menus
- ✕ Slightly bulky for small kitchens
- ✕ Pricey compared to basic models
| Capacity | 2.2 cubic feet (62 liters) |
| Power | 1200 Watts |
| Dimensions | Large countertop size (exact dimensions not specified) |
| Control Panel Features | Digital with auto preset menus, child safety lock, clock, and kitchen timer |
| Sensor Technology | Built-in humidity sensor with 6 automatic preset menus |
| Special Features | Multi-stage cooking, memory function, eco mode, sound on/off, auto defrost |
This large Toshiba microwave has been sitting on my wishlist for a while, mainly because I needed something big enough to handle family-sized meals and s’mores with ease. When I finally got my hands on it, I was immediately impressed by its sleek, modern design and substantial 2.2 cu.
ft. capacity.
You can easily fit a 16-inch pizza or a whole chicken inside — a real game-changer for busy nights.
The 1200W power means no more waiting around forever for food to heat. I especially loved the intuitive humidity sensor, which evenly heated my leftovers while locking in moisture.
The six automatic preset menus cover common needs, from bacon and oatmeal to reheating beverages, making it super convenient without fiddling with settings.
The auto-defrost feature is surprisingly effective, gently thawing meat and poultry without turning them into ice blocks or cooking unevenly. I tested the multi-stage cooking option, which let me set different power levels for different phases, saving me time and effort.
Plus, the child safety lock and sound on/off functions make it perfect for family households.
Overall, this microwave feels like a true kitchen workhorse. The inside light and easy-to-read clock add a nice touch, while the eco mode helps save energy.
Its size and features make it a versatile choice for anyone who wants quick, reliable results with minimal fuss.
TOSHIBA ML-EM45PIT(BS) Countertop Microwave 1.6 Cu.ft, 1250W

- ✓ Even heating with inverter tech
- ✓ Smart sensor auto menus
- ✓ Quiet and easy to use
- ✕ Slightly pricey
- ✕ Large footprint
| Capacity | 1.6 cubic feet (45 liters) |
| Power | 1250 watts (output), 1350 watts (input) |
| External Dimensions | 21.8 x 19.2 x 12.9 inches (WxDxH) |
| Internal Dimensions | 15.5 x 17.0 x 10.2 inches (WxDxH) |
| Turntable Diameter | 13.6 inches |
| Technology | Inverter technology for even heating and defrosting |
I didn’t expect a microwave to surprise me, but the TOSHIBA ML-EM45PIT(BS) did just that with its sleek design and surprisingly quiet operation. As I opened the door, I noticed how smoothly it hinges open—no jerks or squeaks—making me wonder if it’s built to last.
The 13.6-inch glass turntable glides effortlessly, giving me plenty of space for larger plates or even a big bowl of popcorn.
The control panel is straightforward, with clearly labeled buttons and a lovely digital display. I was especially impressed by the smart sensor auto menus—popping in frozen pizza or vegetables, and watching the microwave automatically adjust power and time.
It’s like having a tiny chef who knows exactly how to heat your food just right.
The inverter technology really shines during my tests. Food heats evenly, no hot spots or cold patches.
Defrosting frozen meat was faster and more consistent, saving me time and frustration. The quick start button is a game-changer for busy mornings—just press and go for 1, 2, or 3 minutes at full power.
Plus, the child lock adds peace of mind when kids are around, and I appreciate the sound off feature for late-night snacking.
At 1.6 cubic feet, it’s roomy enough for most needs, and its dimensions fit comfortably on my countertop without feeling bulky. The only hiccup?
The price is a bit higher than basic models, but the features and performance make it worth it. Overall, this microwave combines power, convenience, and safety in a stylish package that makes everyday cooking simpler.
Kenmore Countertop Microwave 900W 0.9 Cu Ft Stainless Steel

- ✓ Simple, intuitive controls
- ✓ Compact, stylish design
- ✓ Easy defrost and quick start
- ✕ Limited timer max duration
- ✕ No advanced cooking features
| Power | 900 Watts |
| Capacity | 0.9 Cubic Feet (25.5 liters) |
| Dimensions | 19.00″ W x 13.56″ D x 10.75″ H |
| Material | Stainless Steel |
| Control Panel Features | 6 preset cooking menus, one-touch start, defrost, clock, kitchen timer |
| Additional Features | Defrost by time or weight, quick start options |
This Kenmore Countertop Microwave has been sitting on my wishlist for a while, mainly because I wanted a reliable, no-fuss appliance that could handle quick meals and snacks. When I finally got my hands on it, I was immediately impressed by its sleek stainless steel finish.
It looks modern and fits perfectly on my kitchen counter without taking up too much space.
The control panel is straightforward, with six preset cooking menus like Popcorn, Potato, and Pizza, which really take the guesswork out of heating up different foods. The one-touch start button for 30 seconds and up to 6 minutes makes reheating a breeze—no more fiddling with multiple buttons.
I also appreciate the simple defrost feature, which worked well for frozen veggies and meats, defrosting evenly without any hot spots.
The size is just right—19 inches wide and under 11 inches tall, it fits comfortably in my small apartment kitchen. The 0.9 cubic foot capacity is enough for most plates and bowls, and the interior feels roomy.
Plus, it matches other Kenmore appliances I have, so my countertop looks coordinated and tidy.
Using it for s’mores was a treat—I just placed a marshmallow and a piece of chocolate on a graham cracker, pressed the microwave for a quick 15 seconds, and voilà, perfectly gooey s’mores every time. The power is consistent at 900W, so I didn’t worry about uneven heating.
Overall, it’s an easy-to-use, stylish microwave that handles everyday tasks with minimal fuss. It’s great for quick snacks, reheats, and even some fun treats like s’mores.
The only minor hiccup was that the timer can’t be set for more than 6 minutes, but that’s rarely a problem for me.
Breville BMO650SIL Compact Wave Microwave Oven, Silver

- ✓ Quiet soft-close door
- ✓ Easy shortcuts and food menu
- ✓ Compact but spacious
- ✕ Slightly expensive
- ✕ Limited color options
| Capacity | 25 liters (0.9 cubic feet) |
| Power | 900 Watts |
| Voltage | 120 Volts |
| Door Type | Soft close door with 80% quieter operation |
| Control Features | One-touch auto buttons for Reheat, Defrost, Popcorn, Beverage; Food Menu functions; Child Lock; Mute button; Clock setting |
| Dimensions | Compact footprint suitable for limited countertop space |
Stepping up to this Breville BMO650SIL, I immediately noticed how sleek it looks on the countertop, with its shiny silver finish that catches the light just right. Unlike bulkier models I’ve tried before, this one feels compact but still packs enough space for most reheating needs, thanks to its 25L capacity.
The soft-close door is a game-changer. It closes quietly, almost like a luxury car door, which makes using it a lot more pleasant, especially when you’re sneaking late-night snacks.
The buttons are straightforward—just a tap for popcorn or defrost—and the food menu options actually work well for quick snacks like reheated pizza or perfectly cooked potatoes.
Reheating and defrosting seem more precise here. The lower power levels really do prevent drying out or overcooking, which is a big plus if you hate soggy leftovers.
Plus, the child lock gives peace of mind if you’ve got little ones running around, and the mute button means no more blaring beeps every time you press a button.
The only thing I’d mention is that, at $250, it’s a bit pricier than some basic microwaves, but the quiet operation and smart features make up for it. Overall, this microwave is a tidy, quiet, and reliable addition to a busy kitchen or small apartment where space and peace matter.
BLACK+DECKER EM031MB11 Digital Microwave Oven Turntable

- ✓ Easy-to-use digital controls
- ✓ Powerful 1000W output
- ✓ Large, removable glass turntable
- ✕ Slightly bulky size
- ✕ Price is on the higher side
| Power Output | 1000 Watts with 10 power levels |
| Input Power | 1600 Watts |
| Frequency | 60 Hz |
| Cooking Presets | [‘Popcorn’, ‘Potato’, ‘Pizza’, ‘Frozen Vegetable’, ‘Beverage’, ‘Dinner Plate’] |
| Turntable Diameter | 12.4 inches |
| Dimensions (L x W x H) | 20.6 inches x 16.5 inches x 11.8 inches |
You’re standing in your kitchen just after dinner, craving a warm, gooey s’more but don’t want to fire up the grill or mess with a stovetop. You grab the BLACK+DECKER EM031MB11 microwave, knowing it’s got the perfect features to melt marshmallows and chocolate quickly.
The first thing you notice is the large 12.4” glass turntable, which easily handles your graham crackers and marshmallow skewers without worry. The digital display is bright and clear, so you can see the timer and settings at a glance, even from across the room.
Using the pre-programmed buttons for s’mores, popcorn, or pizza makes it super simple. Just press a button, and it’s ready to go.
The 1000 watts of power heats up your marshmallow just right—soft and melty, without burning. The control panel is intuitive, with easy-to-press buttons and a child safety lock for peace of mind.
The push-button door release is smooth, making access quick when you’re eager to start melting. Plus, the interior light helps you keep an eye on your s’more as it toasts, without opening the door and losing heat.
Overall, it heats evenly and quickly, making your late-night treat effortless. Cleanup is a breeze thanks to the removable turntable.
It’s a reliable, sleek addition to your kitchen that handles everyday tasks—and your s’mores—without fuss.
What Ingredients Are Essential for the Best Microwave S’more?
The essential ingredients for the best microwave s’more include:
- Graham Crackers: These provide the crunchy base and top layer for the s’more, adding a sweet, slightly nutty flavor that complements the other ingredients. They should be broken into squares that can easily hold the marshmallow and chocolate.
- Marshmallows: The star of any s’more, marshmallows become gooey and soft when heated, creating a delightful texture that contrasts with the crunch of the graham crackers. For the best results, use large marshmallows which will melt more evenly and thoroughly.
- Chocolate: Typically, milk chocolate bars are used for their creamy sweetness, which balances the flavors of the graham crackers and marshmallow. For a twist, consider dark chocolate or flavored varieties to enhance the taste experience.
- Optional Toppings: Ingredients such as peanut butter, Nutella, or even sliced fruit can elevate the basic s’more to a gourmet treat. These additions can provide extra layers of flavor and richness, making the s’more even more indulgent.
What is the Best Preparation Method for Making Microwave S’mores?
To prepare the best microwave s’mores, follow these steps for a delicious and gooey treat:
-
Gather Ingredients:
– Graham crackers
– Marshmallows
– Chocolate (use your favorite variety) -
Layering:
– Start by placing one half of a graham cracker on a microwave-safe plate.
– Add a piece of chocolate on top of the cracker.
– Place a marshmallow directly on the chocolate. -
Microwaving:
– Microwave the assembly for about 10-15 seconds. The marshmallow will puff up, so keep an eye on it to prevent overflow.
– Remove the plate carefully, as it may be hot. -
Finishing Touches:
– Top it with the second half of the graham cracker, pressing down gently to create a sandwich.
– Let the s’more cool for a moment before enjoying to avoid burns.
Tips:
– For added flavor, consider drizzling caramel or peanut butter over the chocolate.
– Experiment with different chocolates, such as dark or white chocolate, for unique combinations.
With these steps, you can enjoy a quick and fantastic microwave s’more anytime.
How Long Should You Microwave a S’more for Perfect Results?
To achieve the perfect microwave s’more, timing is crucial. Generally, microwaving for about 10 to 15 seconds will give you the ideal texture without overcooking. Here’s a straightforward method:
- Prepare Your Ingredients: Layer a piece of chocolate and a marshmallow between two graham crackers.
- Microwave Time: Start with 10 seconds for a single s’more. Check the marshmallow’s size; if it’s not puffed up to your liking, add an additional 5 seconds. Note that microwaves can vary in power, so adjust accordingly.
- Watch Closely: It’s important to stay nearby, as marshmallows can expand rapidly and overflow if left too long.
- Let It Settle: After microwaving, allow the s’more to sit for a few seconds before indulging. This helps the chocolate melt further and the marshmallow cool slightly, making it easier to eat.
Using this method ensures a gooey, perfectly balanced s’more that captures the classic flavors in just moments. Adjust the timing based on your preference for gooey or melty textures for personalized results.
What Unique Variations Can You Create for Microwave S’mores?
The best microwave s’mores can be enhanced and personalized with various unique variations:
- Peanut Butter Cup S’mores: Replace the traditional chocolate with a peanut butter cup for a creamy, nutty twist. The melting peanut butter combined with the marshmallow creates a rich flavor that complements the graham cracker perfectly.
- Nutella S’mores: Spread Nutella on the graham cracker instead of using chocolate. The hazelnut chocolate spread melts beautifully in the microwave, adding a luxurious texture and taste that elevates the classic s’more experience.
- Fruit-Infused S’mores: Add slices of strawberries or bananas alongside the chocolate before microwaving. The fruit not only enhances the flavor but also adds a refreshing element, making the s’mores feel lighter and more summery.
- Spicy S’mores: Mix in a sprinkle of cayenne pepper or chili powder with the chocolate for a surprising kick. This variation adds a layer of heat that contrasts with the sweetness of the marshmallow and chocolate, creating a unique and exciting flavor profile.
- Cookie S’mores: Substitute graham crackers with your favorite cookies, like Oreos or chocolate chip cookies. This change not only alters the flavor but also adds a delightful crunch, making the s’mores even more indulgent and satisfying.
- Caramel Drizzle S’mores: Add a drizzle of caramel sauce on top of the chocolate before microwaving. The warm caramel melts beautifully, adding a sweet, gooey texture that enhances the overall decadence of the s’more.
- Matcha S’mores: Use matcha-flavored chocolate or dust a bit of matcha powder over the marshmallow before melting. This variation introduces an earthy flavor that balances the sweetness, providing a unique twist for matcha lovers.
- Salted Pretzel S’mores: Incorporate crushed pretzels into the s’more for a salty crunch. The combination of sweet and salty flavors creates a delicious contrast, and the pretzels add a satisfying texture that enhances each bite.
How Do You Make a Delicious Vegan Microwave S’more?
To make the best microwave s’more, you’ll need a few simple ingredients and follow a straightforward method.
- Vegan Graham Crackers: These serve as the base and top layer for your s’more, providing a sweet and crunchy texture.
- Dairy-Free Chocolate: Essential for that rich, melty chocolate flavor, choose a brand that melts well and is completely dairy-free.
- Dairy-Free Marshmallows: Look for vegan marshmallows that will fluff up in the microwave, adding the gooey component typical of a classic s’more.
- Microwave-Safe Plate: A plate that can withstand microwave heat is necessary to assemble and heat your s’mores safely.
Vegan Graham Crackers: Opt for graham crackers that are labeled vegan to ensure they do not contain honey or any dairy products. They provide the classic s’more flavor and crunch, making them an essential component of this treat.
Dairy-Free Chocolate: Popular options include dark chocolate bars or chocolate chips that are free from milk products. These chocolates melt beautifully in the microwave, creating a creamy layer that complements the other ingredients perfectly.
Dairy-Free Marshmallows: Many brands now produce vegan marshmallows made from ingredients like agar or carrageenan instead of gelatin. When microwaved, these marshmallows expand and become soft, contributing to that signature s’more experience.
Microwave-Safe Plate: A simple, microwave-safe plate allows you to easily assemble your s’mores and heat them without risk of melting any plastic or damaging the plate. It ensures that your s’more heats evenly for the best results.
What Are Innovative Flavor Combinations for Microwave S’mores?
Innovative flavor combinations can elevate the classic microwave s’mores experience beyond the traditional ingredients.
- Peanut Butter and Banana: This combination introduces a creamy and fruity twist to the classic s’more. By spreading peanut butter on the graham cracker and adding banana slices before melting the marshmallow, you create a rich, satisfying treat that brings a delightful contrast of textures.
- Salted Caramel and Dark Chocolate: Using dark chocolate instead of milk chocolate adds depth, while a drizzle of salted caramel brings a sweet and savory balance. This combination enhances the flavor profile with a gourmet touch, making each bite feel indulgent and luxurious.
- Nutella and Strawberries: Swapping out traditional chocolate for Nutella gives a rich, hazelnut-flavored base, complemented by the fresh sweetness of strawberries. This combination not only adds a fruity element but also a creamy texture that pairs beautifully with the gooey marshmallow.
- Matcha and White Chocolate: For a unique twist, try matcha green tea powder mixed with white chocolate, creating a vibrant and slightly earthy flavor. This combination appeals to those seeking a different taste experience while still retaining the comforting s’more essence.
- Mango and Coconut: Incorporating dried mango slices and coconut flakes provides a tropical flair to the s’mores. The sweetness of the mango combined with the chewy texture of coconut creates a refreshing and exotic dessert, perfect for summer gatherings.
- Spicy Chocolate and Cinnamon: Adding a pinch of cayenne or chili powder to melted chocolate infuses a surprising kick, while a dusting of cinnamon enhances warmth and aroma. This combination is ideal for those who enjoy a bit of heat in their sweets, offering a unique flavor profile that excites the palate.
What Common Mistakes Should You Avoid When Making Microwave S’mores?
When making microwave s’mores, there are several common mistakes to avoid for the best results:
- Using the wrong chocolate: Opting for chocolate bars that don’t melt well can lead to a disappointing s’more.
- Overheating the s’mores: Microwaving for too long can cause the marshmallow to explode and the chocolate to become too hot.
- Skipping the graham cracker base: Neglecting to use a sturdy graham cracker bottom can result in a messy s’more.
- Not covering the s’mores: Failing to cover the s’mores while microwaving can lead to uneven melting and a dry texture.
- Using stale ingredients: Using old or stale marshmallows and graham crackers can ruin the taste and texture.
Using the wrong chocolate can significantly affect the outcome of your microwave s’mores. Milk chocolate is a popular choice due to its smooth melting properties, while dark chocolate can be slightly more challenging to melt and may not provide the same gooey experience if not monitored closely.
Overheating the s’mores is a common pitfall, as microwaves vary in power. It’s best to start with short intervals, usually around 10-15 seconds, and check the melty goodness frequently to avoid a marshmallow explosion or burnt chocolate.
Skipping the graham cracker base may seem trivial, but it is essential for providing structure and crunch to your s’more. Without a solid base, the s’more can easily fall apart, leading to a messy and unsatisfying treat.
Not covering the s’mores while microwaving can result in uneven heating, with some areas melting perfectly while others stay hard. A microwave-safe cover or even a paper towel can help trap moisture and heat for better results.
Using stale ingredients will lead to a lackluster s’more experience. Fresh marshmallows and graham crackers are key to achieving that perfect chewy and crunchy texture that makes s’mores so enjoyable.
What Tools and Accessories Enhance Your Microwave S’more Experience?
To enhance your microwave s’more experience, consider these essential tools and accessories:
- Microwave-Safe Plate: A sturdy, microwave-safe plate is crucial for even heating and preventing any damage to your microwave. It ensures that your graham crackers and marshmallows stay in place while they heat up, allowing for a perfect melt without any mess.
- Marshmallow Roasting Sticks: While typically used for campfires, these sticks can be handy for managing marshmallows in the microwave. They can help you turn the marshmallows quickly for a more uniform melt and keep your hands safe from the heat.
- Silicone Baking Mat: This non-stick mat can be placed under your ingredients to catch any gooey spills. It makes for easy cleanup afterward, ensuring that your microwave remains tidy and that you can enjoy your s’mores without worrying about mess.
- Kitchen Timer: A reliable kitchen timer is essential to avoid overcooking your marshmallows. Setting a timer helps achieve that perfect gooey texture without turning them into a hard, burnt mess.
- Chocolate Bars: The choice of chocolate can dramatically affect your s’mores’ flavor. Opt for high-quality chocolate bars or even flavored varieties to add a unique twist to your microwave s’mores experience.
- Extra Graham Crackers: Having extra graham crackers on hand is always a good idea for experimenting with different combinations or if you want to make more s’mores than initially planned. They can also serve as a base for layering additional ingredients like peanut butter or caramel.