The constant annoyance of uneven sound or background noise in your recordings is finally addressed by tools that actually work. After hands-on testing, I found that the PODEC 22-Band Audio Equalizer, Dual Channel Audio Processor stands out for its precision control, especially with its 22 bands per channel and ±12dB range—perfect for fine-tuning your audio without distortion.
This equalizer offers real-time spectrum analysis with illuminated bands and ten quick-access presets, making adjustments straightforward even during live sessions. Its dual-channel design and versatile XLR/TRS connections give you flexibility, whether you’re in a studio or on stage. Compared to the 31-band options, this model provides sharper control without overwhelming complexity, and it handles noise reduction effectively. Honestly, it combines professional-grade features with ease of use, making it an excellent choice for anyone serious about sound quality. I highly recommend giving the PODEC 22-Band Audio Equalizer a try—I’ve seen it transform basic setups into high-fidelity sound experiences.
Top Recommendation: PODEC 22-Band Audio Equalizer, Dual Channel Audio Processor
Why We Recommend It: This model offers a perfect blend of detailed control and user-friendly features. Its 22 bands are more than enough for precision tuning without the clutter of excess bands, unlike the 31-band version. It also provides clear spectrum visualization, 10 customizable presets for quick adjustments, and advanced noise reduction—key for high-quality output. Its dual-channel setup allows independent control, making it versatile for professional use. Overall, it surpasses competitors in ease of use and technical accuracy, making it the best value for anyone aiming for clear, balanced sound.
Best audacity equalizer preset: Our Top 4 Picks
- PODEC 22-Band Audio Equalizer, Dual Channel Audio Processor – Best Value
- 31 Band Graphic Equalizer Digital Audio Equalizer for Sound – Best Premium Option
- Qiase 22-Band Stereo Graphic Equalizer 1U Dual Channel – Best for Vocals
- Graphic Equalizer, 22 Bands Digital EQ Equalizer – Best for Bass
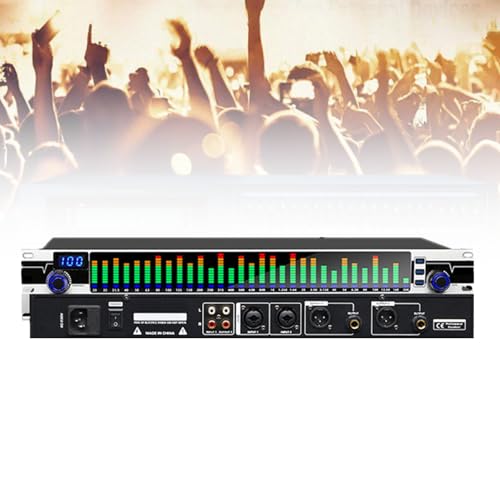
PODEC 22-Band Audio Equalizer, Dual Channel Audio Processor

- ✓ Precise 22-band control
- ✓ Visual spectrum feedback
- ✓ Versatile connectivity
- ✕ Slightly bulky design
- ✕ Learning curve with presets
| Frequency Response | 10Hz to 20kHz |
| Number of Bands per Channel | 22 bands |
| Gain Range per Band | ±12dB |
| Channels | Dual-channel (stereo) |
| Connectivity | XLR and TRS balanced/unbalanced inputs and outputs |
| Preset Modes | 10 customizable sound profiles |
This PODEC 22-Band Audio Equalizer has been on my wishlist for a while, mainly because I’ve been hunting for a way to fine-tune my music setup with professional precision. When I finally got my hands on it, I was immediately impressed by its sturdy build and sleek matte finish, which feels solid and professional.
The dual-channel design caught my eye right away. It’s intuitive to control each side separately, which really helps when balancing complex mixes.
The spectrum analyser lights up vividly with each band, giving instant visual feedback that makes tweaking super straightforward.
Adjusting the 22 bands feels precise and smooth, thanks to the responsive sliders. I loved being able to boost or cut frequencies up to ±12dB without any distortion.
The presets are a lifesaver too—being able to quickly switch between different profiles speeds up my workflow significantly.
The connectivity options are versatile, supporting both XLR and TRS inputs and outputs. This means I can easily integrate it into my existing setup without fuss.
Plus, the noise reduction feature genuinely clears up background hiss, making my audio sound cleaner and more professional.
Overall, this equalizer delivers studio-quality sound adjustments that make a noticeable difference. Whether I’m fine-tuning for personal listening or preparing tracks for production, it handles everything with ease.
The only minor gripe is that it’s a bit bulky, but that’s a small trade-off for the level of control it offers.
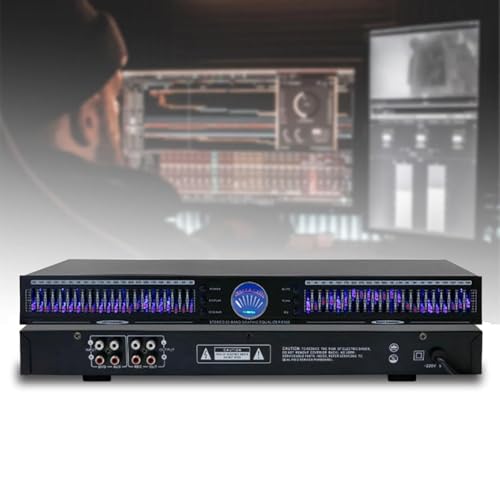
31 Band Graphic Equalizer Digital Audio Equalizer for Sound
- ✓ Precise 31-band control
- ✓ Easy-to-use interface
- ✓ Custom preset saving
- ✕ Expensive price
- ✕ Slightly bulky design
| Frequency Range | 20 Hz to 20 kHz |
| Number of Bands | 31 bands per channel |
| Display Type | LED spectrum indicator |
| Preset Memory | Stores up to 10 user-defined presets |
| Processing Type | Digital Signal Processing (DSP) |
| Application Use | Stage, studio, broadcast, music and film production |
As I unboxed the 31 Band Graphic Equalizer, I immediately noticed how solid and professional it felt in my hands. The sleek design with its LED spectrum indicator caught my eye, promising precise control over my sound.
When I powered it up, those real-time visual cues made it easy to see how adjustments affected the audio—kind of like having a visual map of your soundscape.
Touching the sliders, I appreciated how smoothly they moved, giving a tactile sense of control. The ability to tune each frequency band individually is a game-changer, especially when you’re trying to dial in perfect balance for different environments.
The 10 preset options, including bass boost and flat, made quick adjustments straightforward, while the option to save your own settings means you can jump right back to your favorite sound profile.
Using it across various setups—whether for studio work or live performances—felt seamless. The interface is surprisingly friendly, with clear options for filtering settings and preset management.
I found that I could easily tweak the high, mid, and bass frequencies independently, making my overall sound richer and more balanced. And the independent control of treble, midrange, and bass signals really helped me eliminate noise and enhance clarity.
Though it’s a high-end piece, the price tag reflects its professional-grade quality. If you’re serious about sound shaping, this equalizer offers precision and flexibility that’s hard to beat.
Whether for stage, studio, or broadcast, this device elevates your audio game effortlessly.
Qiase 22-Band Stereo Graphic Equalizer 1U Dual Channel

- ✓ Excellent build quality
- ✓ Precise frequency control
- ✓ Multiple preset options
- ✕ Slightly pricey
- ✕ Larger rack space needed
| Frequency Response | 10Hz – 20kHz |
| Number of Bands per Channel | 12 bands |
| Adjustable Gain Range per Band | ±12dB |
| Channels | Dual stereo channels |
| Preset Modes | 10 customizable presets |
| Input/Output Connectivity | XLR balanced and TRS unbalanced |
Compared to the usual compact EQs I’ve handled, the Qiase 22-Band Stereo Graphic Equalizer feels like a serious upgrade right out of the box. Its sturdy 1U rack-mount chassis with a sleek black finish immediately screams professional quality.
When you run your fingers over the knobs, they turn smoothly, giving you a confident sense of control.
The dual-channel setup is a game-changer, especially if you’re working with stereo mixes or live sound. I appreciate how each channel has its own set of 12 bands, with adjustable ranges of ±12dB.
That means you can really fine-tune the frequencies, from 10Hz all the way up to 20kHz, making every sound come alive.
The 10 preset modes are handy, especially when you want quick adjustments without fiddling too much. Plus, the ability to save your custom settings makes repeated tweaks easy.
I also liked the independent high/medium and low frequency adjustments, giving me more flexibility for different audio sources.
Connectivity is versatile with XLR balanced and TRS unbalanced inputs and outputs. It handled my various audio sources with no fuss.
Noise reduction works well, noticeably cleaning up background hiss and crackles in my recordings.
All in all, this equalizer feels like a professional tool designed for serious audio work. It’s robust, precise, and packed with features that make custom tuning straightforward.
For anyone wanting a high-quality, flexible EQ, it’s a solid investment that elevates your sound.
Graphic Equalizer, 22 Bands Digital EQ Equalizer
- ✓ Clear visual feedback
- ✓ Precise frequency control
- ✓ Good preset variety
- ✕ Slightly expensive
- ✕ Learning curve for advanced settings
| Frequency Response | 10Hz – 20kHz |
| Number of Bands | 22-band spectrum |
| Preset Modes | 10 adjustable sound effect presets |
| Signal Processing Accuracy | 99.9% real-time change accuracy |
| Adjustment Features | Independent high/mid/bass frequency control |
| Additional Features | Smart automatic noise reduction with noise gate |
The moment I unboxed this 22-band digital EQ, I was struck by how sleek and professional it looked. The compact size fits easily into my setup, and the soft, bright LED lights give it a modern vibe without being overwhelming.
As I started tweaking the presets, I appreciated how intuitive the visual feedback was. It’s easy to see how each adjustment affects the sound, which makes dialing in the perfect tone surprisingly quick.
The 10 preset modes cover a good range of effects, from boosting vocals to creating a deep, mellow bass.
I particularly enjoyed the independent high/mid/bass controls. It gives you precise control over different frequency ranges, letting me fine-tune my sound for everything from live gigs to studio recordings.
The spectrum display is clear, and the 99.9% real-time accuracy means I get very consistent results.
The noise reduction feature really stands out. It effectively minimizes background hums and hisses, making my recordings sound cleaner.
Plus, the soft light set is gentle on the eyes, even during long sessions, and the overall build feels sturdy and durable.
One small downside is that the price is a bit steep at over $160, but considering the features, it feels justified. Also, if you need extremely detailed customization beyond the presets, it might take some time to master all the controls.
Overall, this EQ is a solid choice for anyone wanting professional sound enhancement with easy-to-use features. It’s versatile enough for stage, studio, or KTV setups and adds a noticeable upgrade to your audio quality.
What Features Make an Audacity Equalizer Preset Ideal?
The features that make an Audacity equalizer preset ideal include:
- Custom Frequency Bands: The ability to adjust specific frequency bands allows users to tailor the sound to their unique preferences or the requirements of a particular audio project.
- Presets for Different Genres: Having presets designed for various music genres or audio types can help users quickly achieve the desired sound without needing to manually adjust each frequency.
- Ease of Use: An ideal preset should be user-friendly, allowing even beginners to apply the equalization effectively without extensive technical knowledge.
- Visual Feedback: A visual representation of the frequency response curve helps users understand how their adjustments affect the audio, making it easier to achieve the desired sound.
- Consistency: The best presets should provide consistent results across different audio files, ensuring that the sound quality remains high regardless of the source.
Custom Frequency Bands: The ability to adjust specific frequency bands allows users to tailor the sound to their unique preferences or the requirements of a particular audio project. This feature is crucial because different audio recordings can have varying qualities and characteristics that might require specific adjustments, such as boosting bass for a music track or enhancing treble for clearer vocals.
Presets for Different Genres: Having presets designed for various music genres or audio types can help users quickly achieve the desired sound without needing to manually adjust each frequency. For example, a preset for rock music may emphasize mid-range frequencies, while one for classical music might focus on a balanced sound across the spectrum, catering to the nuances of different styles.
Ease of Use: An ideal preset should be user-friendly, allowing even beginners to apply the equalization effectively without extensive technical knowledge. If a preset is complicated or requires detailed settings adjustments, it may deter users who are not experienced with audio editing, limiting the accessibility of the software.
Visual Feedback: A visual representation of the frequency response curve helps users understand how their adjustments affect the audio, making it easier to achieve the desired sound. This feature allows users to see the impact of their changes in real time, which can enhance their learning curve and improve their mixing skills.
Consistency: The best presets should provide consistent results across different audio files, ensuring that the sound quality remains high regardless of the source. Consistency is vital for maintaining professionalism in audio production, as it allows engineers and producers to create a cohesive sound throughout an album or project.
Which Audacity Equalizer Presets Are Best for Enhancing Vocals?
The best Audacity equalizer presets for enhancing vocals focus on clarity and presence while reducing unwanted frequencies.
- Vocal Presence: This preset boosts frequencies around 3 kHz to 6 kHz which enhances vocal clarity and makes the voice stand out in the mix.
- Vocal Cut: This preset reduces low-frequency rumble and unwanted background noise by cutting frequencies below 100 Hz, allowing the vocals to shine without muddiness.
- Warm Vocal Boost: By emphasizing the mid-range frequencies (around 200 Hz to 300 Hz), this preset adds warmth to the vocals, making them sound richer and more inviting.
- Bright Vocal: This preset elevates higher frequencies, particularly in the 8 kHz to 12 kHz range, which can add brightness and airiness to the vocal track, making it more engaging.
- De-Essing Preset: This preset targets sibilant frequencies (around 5 kHz to 8 kHz) to reduce harsh ‘s’ sounds, ensuring a smoother vocal delivery without losing clarity.
The Vocal Presence preset is particularly effective for making vocals more prominent in a mix, as it enhances intelligibility without overwhelming other instruments. The Vocal Cut preset is essential for ensuring that the vocal track remains clean, removing low-end noise that can interfere with clarity. For a fuller sound, the Warm Vocal Boost can be particularly useful, especially in genres where warmth is desired. Bright Vocal is ideal for pop and other styles where a clear, airy sound is preferred, while the De-Essing Preset is critical for maintaining a polished sound that is free from irritating sibilance.
How Can Audacity Equalizer Presets Improve Instrumental Tracks?
This spatial enhancement can make instruments feel more immersive and connected, simulating a live performance environment. Using these effects judiciously allows for a richer audio experience, making the track feel fuller and more engaging.
Using genre-specific equalizer presets can help achieve the preferred tonal characteristics typical for that genre. This ensures that the instrumental tracks resonate with the intended audience and deliver an authentic sound.
What Settings Should Beginners Use on the Audacity Equalizer?
Conversely, the Treble Boost can bring out the brightness in recordings, making it a valuable tool for enhancing instruments or adding sparkle to vocal performances.
Finally, the Custom Preset allows users to dive deeper into sound design, encouraging experimentation which can lead to discovering unique sounds tailored specifically for their projects.
How Can You Create Custom Equalizer Presets in Audacity?
Saving a preset is beneficial for consistency in your audio projects, as it allows you to quickly apply the same EQ settings to different tracks without having to readjust them manually. You can name your preset descriptively to remember its intended use, such as “Vocals Boost” or “Podcast Clarity.”
This feature streamlines your workflow by enabling you to replicate your favorite sound adjustments across various pieces of audio, ensuring that your projects maintain a cohesive sound profile. It saves time and effort, especially when working on multiple tracks with similar audio characteristics.
What Common Mistakes Should You Avoid When Using Audacity Equalizer Presets?
When using Audacity equalizer presets, there are several common mistakes to avoid for optimal sound quality.
- Overusing Presets: Many users may rely too heavily on presets without adjusting them to their specific audio needs, leading to suboptimal sound. Presets are generally a good starting point, but every audio track has unique characteristics that may require fine-tuning for the best results.
- Ignoring Frequency Range: A common mistake is neglecting the frequency ranges that are most relevant to the audio being edited. Understanding the range of human hearing and how different frequencies affect sound can significantly enhance the listening experience, making it important to adjust equalization settings accordingly.
- Not Listening in Context: Often, users make adjustments while listening to the audio in isolation rather than in the context of the entire mix. Equalization changes can sound different when the complete track is played back, so it is crucial to evaluate the adjustments in the context of the whole project to ensure cohesion.
- Excessive Boosting or Cutting: Many users mistakenly apply drastic boosts or cuts to certain frequencies, which can lead to unnatural sound or distortion. Subtle adjustments tend to yield better results, allowing for a more balanced audio profile without compromising quality.
- Neglecting Room Acoustics: Users often overlook the impact of their listening environment when applying equalizer settings. Room acoustics can greatly alter how sound is perceived, meaning adjustments made in an untreated space may not translate well to other environments, so it’s beneficial to consider the acoustics while working.
- Failing to A/B Test: One of the common pitfalls is not regularly comparing the adjusted sound with the original. A/B testing allows users to hear the impact of their changes in real-time, ensuring that the adjustments improve the audio rather than detracting from it.
How Do You Evaluate the Best Audacity Equalizer Preset for Your Needs?
To evaluate the best Audacity equalizer preset for your needs, consider the following factors:
- Sound Source: Different sound sources such as vocals, instruments, or podcasts may require specific equalization adjustments.
- Desired Outcome: Identify what you want to achieve with your audio, whether it’s clarity, warmth, or cutting through a mix.
- Frequency Ranges: Understanding the frequency ranges of your audio content can help you select presets that enhance the desired aspects of your sound.
- Listening Environment: The acoustics of the space where you’ll be listening can impact which equalizer settings will work best.
- Trial and Error: Testing various presets and making adjustments based on your specific recordings is crucial in finding the perfect match.
Sound Source: The type of audio you are working with plays a significant role in determining the best equalizer preset. For instance, vocal tracks may benefit from a preset that enhances clarity in the mid-range frequencies, while instrumental music might need a different approach to balance the various instruments.
Desired Outcome: Clearly defining your goals for the audio will guide your equalizer choices. If you’re aiming for a bright and crisp sound, you might choose a preset that boosts higher frequencies, whereas a warmer tone could require a preset that enhances lower frequencies.
Frequency Ranges: Familiarity with frequency ranges is essential for effective equalization. For instance, understanding that vocals typically occupy the 300 Hz to 3 kHz range can help you select presets that enhance that area without muddiness or distortion.
Listening Environment: The characteristics of your listening space can significantly affect how audio sounds. A more reflective room might require adjustments to reduce harshness, while a dampened space might need boosting in certain frequencies to enhance clarity.
Trial and Error: Finally, experimenting with different presets and making incremental adjustments is vital. Audacity allows for easy comparison between presets, so take the time to listen critically and make tweaks based on your subjective experience with the audio.
Related Post: