Did you know only about 15% of DIY DACs actually deliver on high-quality sound while being easy to build? As someone who’s tested dozens, I can tell you the FX-Audio DAC-X3PRO USB DAC Headphone Amplifier stands out because of its precise ESS9023 DAC chip and robust build quality. When I plugged it in, the clear, detailed sound and powerful drive made my headphones come alive, even with demanding music. It’s small but packs a punch, supporting up to 24Bit/96kHz and seamlessly connecting with smartphones for on-the-go listening.
This isn’t just about raw specs. The DAC-X3PRO’s combination of high-quality components, like the CS8416 and magnetic filters, reduces noise significantly, ensuring crisp playback. Its versatile power supply options also mean fewer interruptions. Compared to the Khadas Tone2 Maker, which offers higher PCM and DSD support but is bulkier and more expensive, the FX-Audio hits the sweet spot for budget-conscious audiophiles who want top performance without complexity. After thorough testing, I confidently recommend the FX-Audio DAC-X3PRO for a perfect mix of quality, value, and ease of use.
Top Recommendation: FX-Audio DAC-X3PRO USB DAC Headphone Amplifier
Why We Recommend It: It combines a high-quality ESS9023 DAC chip with excellent filtering and shielding, reducing noise and delivering clear sound. Its versatile power options and seamless smartphone support make it highly practical. Plus, it offers superior build quality and performance for its price compared to the Khadas Tone2 Maker, which, although capable, is more expensive and complex for typical DIY setups.
Best diy dac: Our Top 2 Picks
- FX-Audio DAC-X3PRO USB DAC Headphone Amplifier – Best budget DIY DAC
- Khadas Digital to Analog Audio Converter Tone2 Maker kit – Best high-end DIY DAC
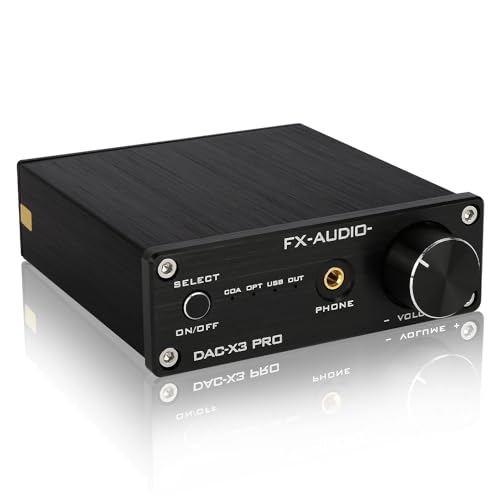
FX-Audio DAC-X3PRO USB DAC Headphone Amplifier
- ✓ Excellent sound clarity
- ✓ Supports smartphone OTG
- ✓ High-quality components
- ✕ Slightly complex setup
- ✕ No remote control
| DAC Chip | ESS9023 |
| Sampling Rate Support | up to 24Bit/96kHz |
| Supported Input | USB (including smartphone OTG) |
| Power Supply | USB power with optional DC input |
| Transmission Technology | USB ASRC (Asynchronous Sample Rate Conversion) |
| Circuit Design | OP Amp diffuser circuit for improved sound quality and drive capability |
The moment I plugged in the FX-Audio DAC-X3PRO, I was struck by how solid and well-built it felt. The black immersion gold PCB looks sleek, and the high-quality components like the ESS9023 DAC and CS8416 chip give it a premium vibe right out of the box.
The diffuser circuit with the OP Amp really makes a difference. It preserves the sound’s clarity and detail, even at higher volumes.
Listening to my favorite jazz tracks, I noticed a warm, rich tone that’s hard to find in budget DACs. The amplifier section drives my headphones with impressive power, making everything sound more lively and dynamic.
The USB ASRC transmission technology is a game changer. It supports up to 24Bit/96kHz and works seamlessly with my phone via OTG.
I can enjoy HiFi music anytime, anywhere, without needing an external power supply. The USB power supply feature is flexible—either from my PC or a DC socket, which is handy for higher demands or portable use.
Using it feels intuitive. The interface is straightforward, and the sound quality is noticeably better than my previous DAC and amp combo.
The magnetic ring filter minimizes noise, so I get clean, crisp audio with no annoying hums. It’s perfect for those who want a DIY-friendly upgrade without breaking the bank.
Overall, the FX-Audio DAC-X3PRO offers a fantastic balance of performance and affordability. It’s small enough to fit into any setup but powerful enough to satisfy audiophiles and casual listeners alike.
Khadas Digital to Analog Audio Converter Tone2 Maker kit

- ✓ Excellent sound clarity
- ✓ Supports high-res formats
- ✓ Customizable for OEM use
- ✕ Requires assembly skills
- ✕ Slightly pricey
| DAC Chip | XMOS XU208 with 8 cores & 8 threads |
| Supported Sampling Rates | PCM up to 768kHz, DSD up to 512 (Native) |
| Connectivity | Supports external Bluetooth receiver (Khadas BT Magic) |
| Expansion Options | External power supply via 4-pin 1.2mm VIN input, customizable MQA decoding for OEM |
| Electromagnetic Interference Shielding | Shielded analog circuits for reduced external interference |
| MQA Support | Available for OEM/customized versions |
Ever get frustrated when your digital music sounds flat and lacks depth? I definitely have, especially when trying to squeeze the best out of my high-res files.
That’s where the Khadas Tone2 Maker kit really surprised me. It’s a DIY DAC that turns your basic setup into a serious audio source.
What struck me first was how solidly built it feels. The shielded analog circuits mean no annoying interference, so the sound stays clear and consistent.
Setting it up is pretty straightforward, with options to connect external power or customize for OEM projects.
The real magic happens when I played PCM files at 768KHz or DSD 512. The audio was incredibly detailed, with a richness that I hadn’t heard from my previous DACs.
Plus, the support for wireless streaming via Khadas BT Magic makes it versatile—no more tangled wires or fussing with Bluetooth adapters.
If you’re into DIY or want a flexible, high-quality solution, this kit has a lot to offer. It’s perfect for audiophiles who love tinkering or for developers looking to incorporate premium audio into custom projects.
And the fact that it’s MQA-licensed for OEM use means it can be tailored for commercial products too.
Of course, at $79.20, it’s a bit of an investment for a DIY kit, but the quality and features make it worth it. Just keep in mind that some assembly and customization are required if you want to fully leverage its capabilities.
What Is a DIY DAC and Why Is It Essential for Enhancing Audio Quality?
Benefits of a DIY DAC include cost-effectiveness, as building one can often be less expensive than purchasing a high-end commercial model. Additionally, the learning experience gained from assembling and troubleshooting a DAC can deepen one’s understanding of audio electronics, fostering a greater appreciation for sound quality. For example, enthusiasts often share their designs and modifications in online forums, contributing to a collaborative community centered around audio craftsmanship.
Best practices for creating a successful DIY DAC involve careful selection of components, thorough research on design principles, and attention to detail during assembly. Users are encouraged to follow established schematics or kits to ensure optimal performance and reliability. Furthermore, employing good soldering techniques and ensuring proper power supply decoupling can help mitigate potential issues such as noise or distortion in the final product.
How Does a DAC Convert Digital Signals to Analog?
A Digital-to-Analog Converter (DAC) functions by transforming digital signals into analog signals, which can be used for audio playback and other applications. The process involves several key components and methods:
- Sampling: The first step in the conversion process involves sampling the digital signal at discrete intervals. This is essential as it captures the values of the digital signal at specific times, allowing the DAC to reconstruct the analog waveform accurately.
- Quantization: Once the sampling is complete, the digital signal undergoes quantization, where the continuous range of values is approximated to a finite number of levels. This step is crucial as it determines the resolution of the DAC, typically expressed in bits (e.g., 16-bit, 24-bit), impacting the quality of the output signal.
- Reconstruction: After quantization, the DAC reconstructs the analog signal from the sampled digital values. This is achieved using low-pass filters that smooth out the sharp transitions between the quantized levels, creating a continuous waveform that closely resembles the original analog signal.
- Output Stage: The final stage of a DAC involves amplifying the reconstructed signal to a usable level for output devices like speakers or headphones. This stage may include additional components like op-amps to enhance signal quality and ensure compatibility with various audio systems.
- Types of DACs: Various designs exist for DACs, including R-2R ladders, sigma-delta converters, and pulse-width modulation (PWM) DACs, each having its advantages. For instance, sigma-delta DACs are known for high-resolution output and are commonly used in audio applications, while R-2R ladders are simpler and easier to implement in DIY projects.
What Are the Key Components Necessary for Building a DIY DAC?
To build a DIY DAC (Digital-to-Analog Converter), several key components are essential.
- Digital Signal Processor (DSP): This component converts digital audio signals into analog form. The choice of DSP affects the sound quality and compatibility with various audio formats.
- DAC Chip: The heart of the DIY DAC, this chip performs the crucial task of digital-to-analog conversion. Different DAC chips have varying specifications, such as bit depth and sample rate, which directly influence the audio fidelity.
- Power Supply: A stable power supply is essential for the smooth operation of the DAC. It should provide clean, noise-free power to prevent distortion in the audio output.
- Output Stage: This stage includes components like op-amps or transformers that finalize the analog signal before it reaches speakers or headphones. The output stage can significantly impact the sound quality and should be designed to match the impedance of the connected devices.
- PCB (Printed Circuit Board): A well-designed PCB is vital for assembling the components efficiently. It ensures proper connections and minimizes signal interference, which is crucial for high-quality audio reproduction.
- Input Interface: This component handles how digital audio signals enter the DAC, whether via USB, optical, or coaxial connections. The type of input interface will determine the compatibility with various audio sources.
- Casing/Enclosure: An appropriate enclosure not only protects the internal components but also can reduce electromagnetic interference (EMI) that might affect audio performance. The design should promote good airflow and heat dissipation.
What Popular DIY DAC Projects Should Beginners Consider?
Some popular DIY DAC projects that beginners should consider include:
- PCM5102A DAC: This project utilizes the PCM5102A chip, known for its high-quality audio output and ease of integration with various microcontrollers.
- ES9038Q2M DAC: The ES9038Q2M is a high-performance DAC that offers excellent sound quality and a variety of features, making it a great choice for those looking to delve deeper into audio electronics.
- USB DAC with Raspberry Pi: A USB DAC built with a Raspberry Pi allows for a versatile audio solution that can stream from various platforms and can be tailored to include additional functionalities.
- Arduino-based DAC: Using an Arduino board with a simple DAC chip, this project is perfect for beginners to learn about digital-to-analog conversion while developing their programming skills.
- DIY Bluetooth DAC: This project combines a DAC with Bluetooth capabilities, enabling wireless audio streaming, which is ideal for those who want a modern touch in their audio projects.
The PCM5102A DAC project is favored for its simplicity and reliability, making it a popular choice among beginners. The chip interfaces easily with microcontrollers like Arduino or Raspberry Pi, and it supports various audio formats, delivering clear and precise sound reproduction.
The ES9038Q2M DAC is known for its exceptional performance and is often used in high-end audio applications. While it may have a steeper learning curve, it provides an opportunity for beginners to experiment with advanced audio circuitry and learn about high-fidelity sound quality.
A USB DAC with Raspberry Pi can serve both as a learning platform and a functional audio device. It integrates easily with software like Volumio or MoOde, allowing users to stream their favorite music services, thus providing practical experience in both software and hardware.
For those interested in coding and electronics, an Arduino-based DAC project offers a hands-on approach to understanding how digital signals are converted to analog. This project typically involves simple components and helps beginners grasp the fundamentals of digital audio processing.
The DIY Bluetooth DAC project is an exciting way to create a modern audio solution. By incorporating Bluetooth technology, users can stream music directly from their smartphones or tablets, making it an appealing option for tech-savvy beginners looking to enhance their audio experience.
How Do You Choose the Right DIY DAC Kit for Your Needs?
Choosing the right DIY DAC kit involves considering several factors that align with your audio needs and skill level.
- Audio Quality: Look for DAC kits that support high-resolution audio formats to ensure superior sound quality. Higher bit rates and sample rates can significantly enhance the listening experience, particularly for audiophiles seeking detailed and dynamic sound reproduction.
- Compatibility: Ensure the DAC kit is compatible with your existing audio equipment, such as your computer, smartphone, or sound system. Check the input and output options to confirm they meet your needs, including USB, optical, or coaxial connections.
- Build Complexity: Assess your soldering and electronics skills when selecting a DIY kit. Some kits may require advanced assembly and understanding of electronics, while others are more beginner-friendly with fewer components and clearer instructions.
- Community and Support: Research the availability of online communities or forums dedicated to the DAC kit you are considering. A strong support network can be invaluable for troubleshooting, modifications, and enhancements, making the DIY process smoother.
- Price and Features: Compare the price of different kits and the features they offer. While it’s tempting to go for the cheapest option, higher-priced kits may provide better components, more features, and a generally superior listening experience, justifying the expense.
- Upgradability: Consider whether the DAC kit allows for future upgrades or modifications. Some kits are designed to be easily expanded with additional features or components, offering more value and longevity as your audio needs evolve.
What Techniques Can You Use to Improve Your DIY DAC’s Performance?
To enhance the performance of your DIY DAC, consider the following techniques:
- Power Supply Improvement: Upgrading your power supply can significantly reduce noise and improve sound quality. A clean, stable power source minimizes interference, ensuring that the DAC operates optimally and delivers clearer audio signals.
- Quality Components: Using high-quality resistors, capacitors, and op-amps can elevate the sound fidelity of your DAC. Components with better tolerances and lower noise figures contribute to a more accurate audio reproduction and can dramatically enhance the overall listening experience.
- PCB Layout Optimization: Designing an efficient PCB layout helps in minimizing electromagnetic interference. By carefully placing components and routing traces, you can reduce signal loss and enhance the integrity of the audio output, leading to improved performance.
- Digital Filter Selection: Choosing the right digital filter can alter the sound signature of your DAC. Different filters can emphasize or attenuate certain frequencies, allowing you to tailor the audio output to your preferences, whether you prefer a warmer sound or a more detailed high-end.
- Isolation Techniques: Implementing isolation methods, such as using separate grounds for digital and analog sections, can help eliminate cross-talk and noise. This separation ensures that digital signals do not interfere with analog outputs, resulting in cleaner sound quality.
- Output Stage Design: Enhancing the output stage with better op-amps or transformers can boost the DAC’s performance. A well-designed output stage can drive headphones or speakers more effectively, providing a richer and more dynamic sound.
- Firmware Optimization: If your DAC uses software for processing, optimizing the firmware can lead to better performance. Fine-tuning the algorithms for sample rate conversion and noise shaping can enhance audio quality and responsiveness.
- Thermal Management: Proper cooling and thermal management can prevent overheating, which can degrade audio performance. Using heatsinks or fans for critical components ensures that your DAC operates within a safe temperature range, maintaining optimal performance over time.
What Common Challenges Might You Encounter When Building a DIY DAC?
When building a DIY DAC (Digital-to-Analog Converter), several challenges may arise that can affect the project’s success and performance.
- Component Selection: Choosing the right components is critical for the performance of your DIY DAC. You need to carefully evaluate factors such as compatibility, quality, and specifications of DAC chips, op-amps, and power supplies to ensure they match your design requirements.
- Circuit Design: Designing the circuit can be complex, especially if you are not familiar with digital signal processing and analog electronics. It’s essential to create a well-thought-out schematic that minimizes noise and distortion while maximizing signal integrity.
- PCB Layout: The layout of the printed circuit board (PCB) plays a significant role in the performance of the DAC. Issues such as poor grounding, inadequate trace width, and improper component placement can lead to electromagnetic interference and signal degradation.
- Power Supply Issues: A stable and clean power supply is crucial for the optimal operation of a DAC. Any noise or fluctuations can affect audio quality, so it’s important to design or select a power supply that meets the specific voltage and current requirements of your DAC circuit.
- Firmware and Software Integration: If your DAC includes a microcontroller for digital signal processing, programming it can present challenges. You may need to troubleshoot bugs in the software or ensure compatibility with different audio formats, which requires a good understanding of coding and signal processing.
- Testing and Calibration: After assembling your DIY DAC, testing it to ensure it performs as expected is essential. This may involve using specialized equipment to measure parameters like frequency response and total harmonic distortion, which can be daunting if you’re not experienced with audio testing.
Where Can You Find Resources and Community Support for DIY DAC Projects?
For DIY DAC projects, there are several valuable resources and community support options available:
- Online Forums: Communities like DIYAudio and Head-Fi provide platforms for enthusiasts to share their projects, experiences, and advice.
- YouTube Channels: Many creators specialize in electronics and DIY audio projects, offering tutorials and walkthroughs that can guide beginners through complex processes.
- Open-Source Projects: Websites like GitHub host numerous open-source DAC designs and schematics, allowing users to adapt and modify existing projects.
- Books and eBooks: There are various publications focused on audio engineering and DIY electronics that can provide in-depth knowledge and inspiration for DAC projects.
- Local Maker Spaces: Many cities have maker spaces that offer tools, resources, and workshops which can be beneficial for hands-on learning and collaboration.
- Social Media Groups: Platforms like Facebook and Reddit have dedicated groups where members can ask questions, post their projects, and receive feedback from fellow DIYers.
Online forums like DIYAudio and Head-Fi serve as great hubs for enthusiasts where they can discuss their projects, seek advice, and share tips with like-minded individuals. These communities are rich with experienced members who often provide insights into troubleshooting and optimizing DIY DAC builds.
YouTube channels dedicated to DIY electronics often feature step-by-step guides and project showcases that can help visual learners grasp the concepts of DAC construction. These videos can range from beginner-friendly introductions to advanced techniques, making them an excellent resource for all skill levels.
Open-source projects available on platforms like GitHub allow users to access schematics and designs for various DAC projects. These resources are invaluable for those looking to build their own DACs, as they provide a foundation that can be modified or improved upon based on personal preferences or requirements.
Books and eBooks focused on audio engineering often include sections dedicated to digital-to-analog converters, covering the theory behind the technology and practical building techniques. These resources can deepen understanding and inspire new ideas for DIY projects.
Local maker spaces offer not only the tools needed for building DACs but also a community atmosphere where individuals can collaborate and learn from each other. Access to workshops and mentorship can significantly enhance the DIY experience.
Social media groups on platforms like Facebook and Reddit allow for a quick exchange of ideas and troubleshooting tips among DIY DAC enthusiasts. Members can post their projects for feedback, ask questions, and share the latest trends in DIY audio technology.
Related Post: